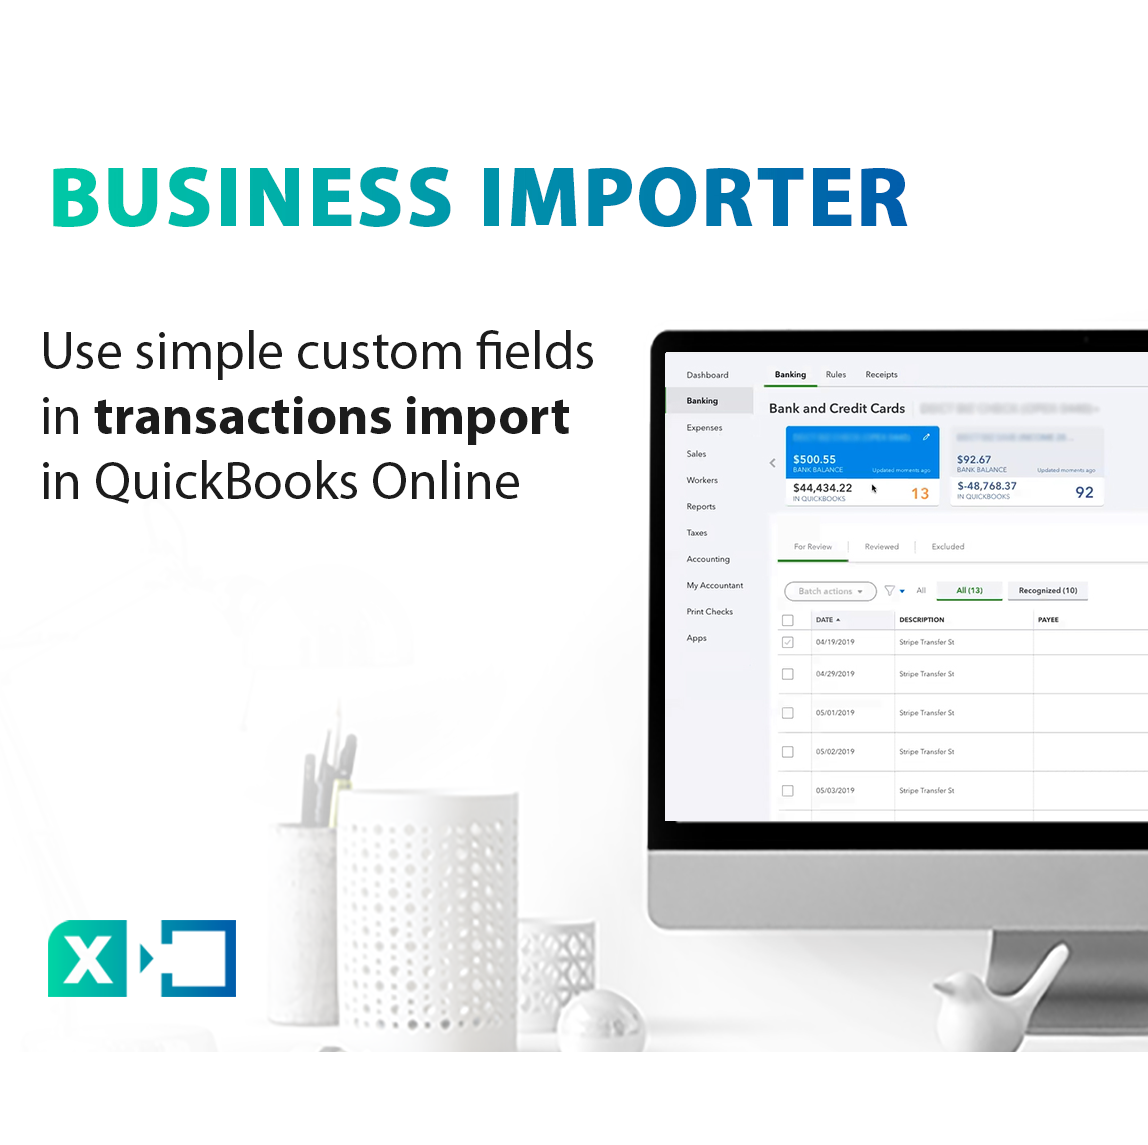
Use simple custom fields in transactions import in QuickBooks Online
Business Importer – is a helpful tool to fulfil transactions import in QuickBooksⓇ Online. For our current users and for everyone who will use the app in future, we have added a new function – to add simple custom fields in transactions import. How it works, read in our article.
Overview:
1. Simple steps to upload files with custom fields into QuickBooks Online
Step 1. Set up the necessary fields in your QuickBooks Online account.
Go to Gear icon, then select Company settings.
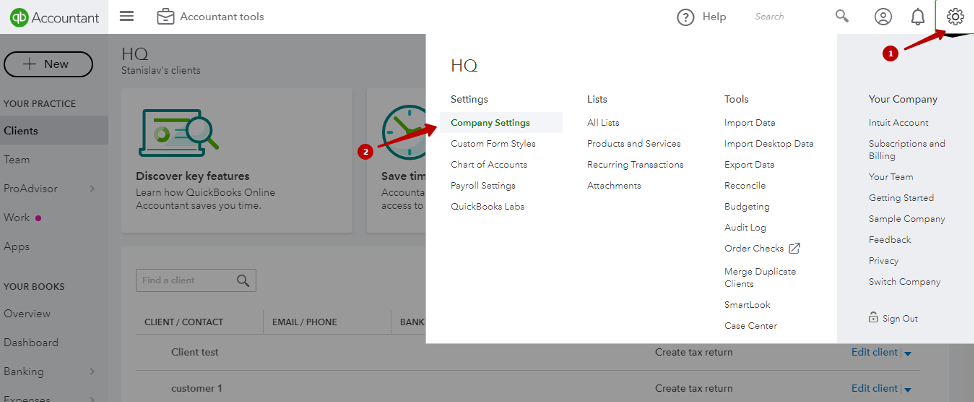
Click on the Sales tab on the left and choose Sales Form Content.
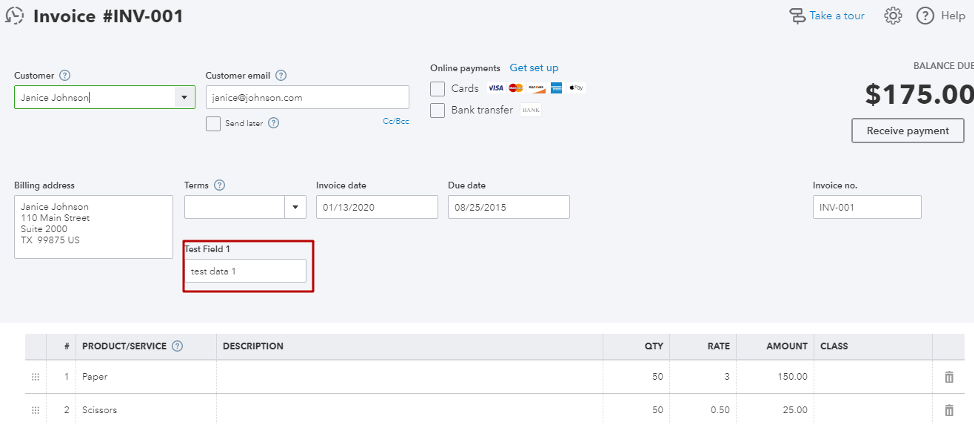
Enter a necessary Name into each box in the Custom Fields, and choose the way you want to use this custom field – internal (only within QuickBooks Online account), public (shown on sales forms), or both together
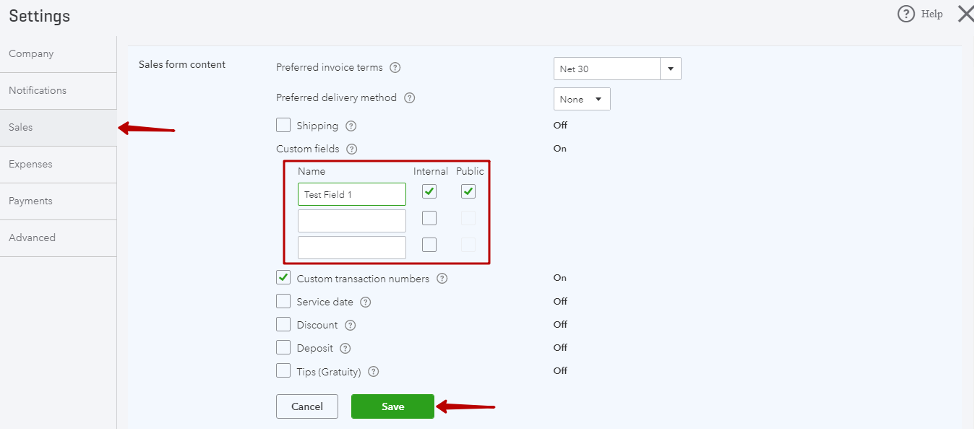
Click on the Save button. Now you can see your Custom fields appear in your sales forms templates on QuickBooks side.

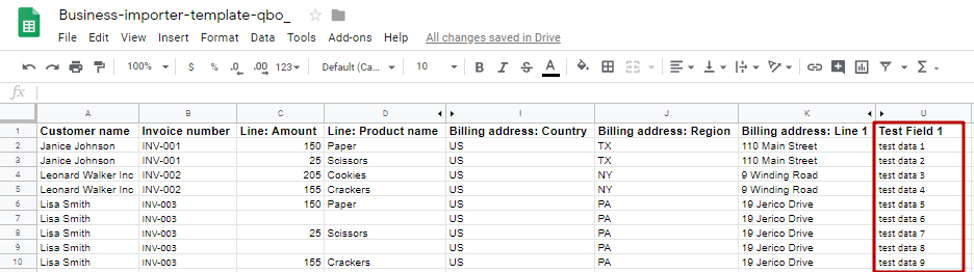
Step 2. Prepare your file to be imported into QuickBooks Online.
Please note the file with transactions you want to import, has to include new columns with the name of your new Custom fields.
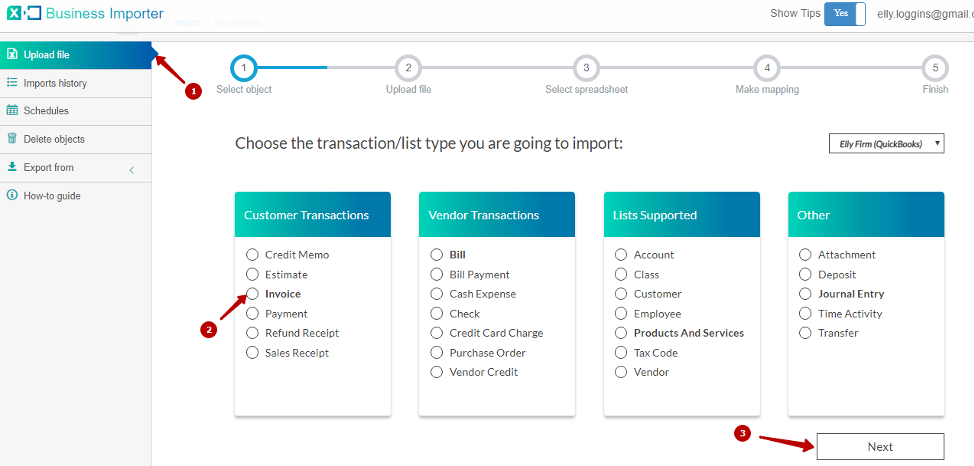
Step 3. Start transactions import in QuickBooks Online.
1. Go to the Upload file tab, select a required entity or transaction and press Next.
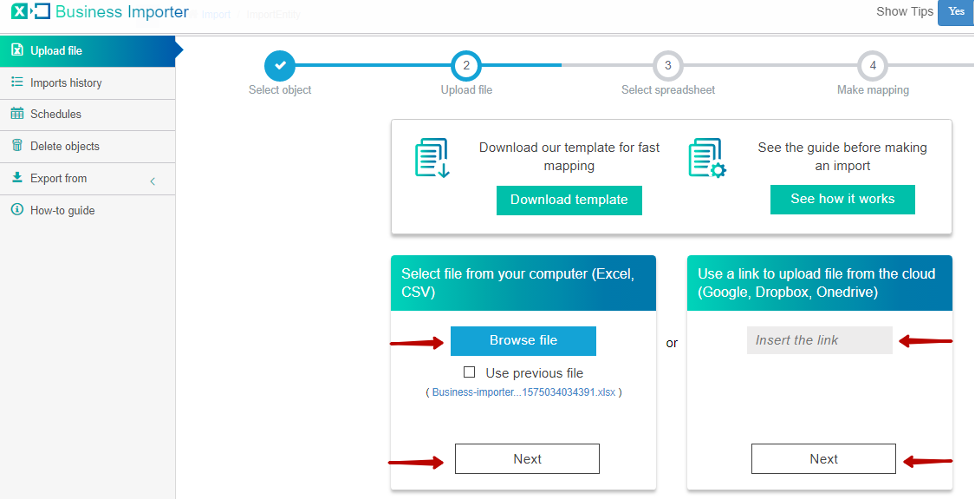
2. Select the file you want to upload from your PC or paste the link from Google Sheets, DropBox or Microsoft OneDrive.
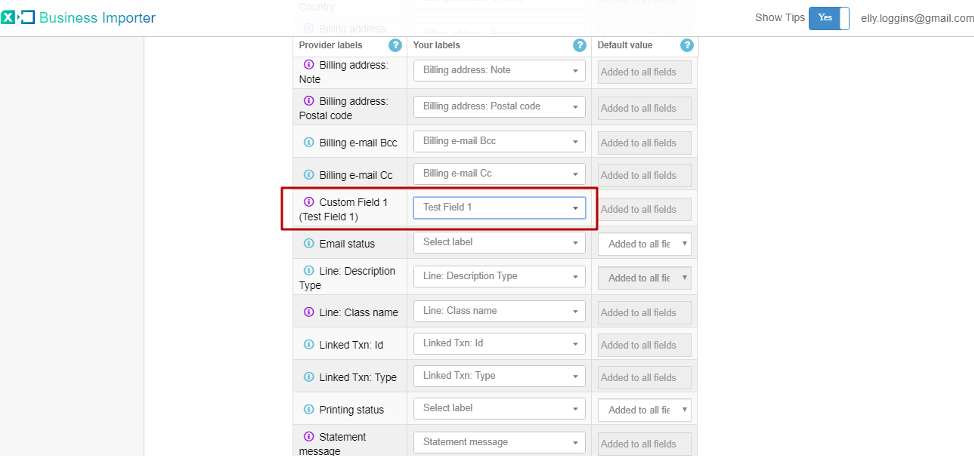
3. Map Provider Labels fields with Your Labels from the file on the Mapping step. Please make sure you have mapped the labels with the name of your Custom fields in the Mapping step. After that go to the bottom of the page and click on the Next button to see the preview or Start import button to proceed the import.
4. Congratulations, you have successfully imported your file containing transactions or entities with custom fields.
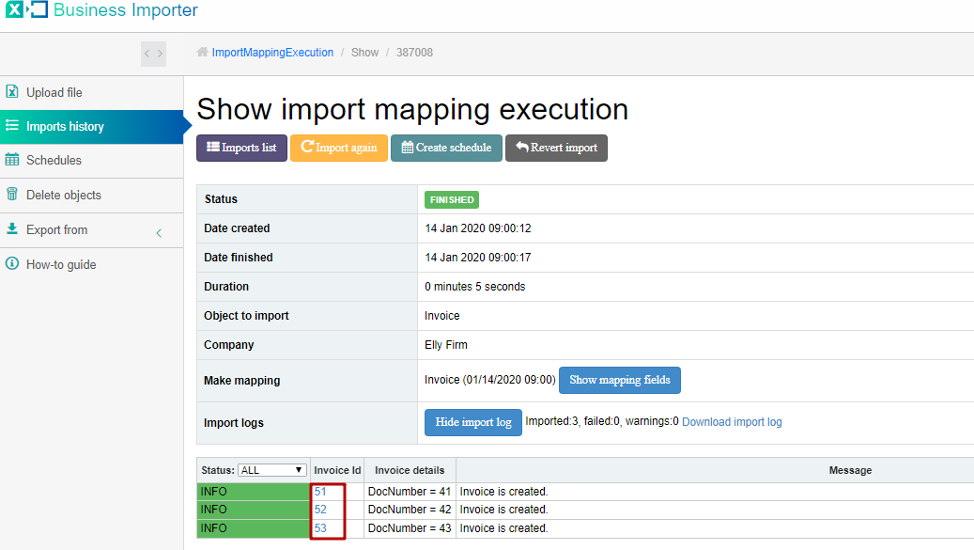
Please press ID numbers to see each transaction or entity on QuickBooks side.
2. Useful tips on how to work with your transactions with Business Importer
1. Check out our detailed guide on how to delete your transactions from QuickBooks with the help of Business Importer.
2. Another useful option of Business Importer is that you can schedule your imports to be done automatically without you even entering the app.
3. Read this simple guide to find out how to upload your files using Google Sheets, DropBox or Microsoft OneDrive link into QuickBooks.
Remember: if you have any questions you can address them to us. We’ll be glad to help you!
Just leave us a message filling out our contact form or use the phone/email mentioned in the footer of every page.
Do you have an article on custom fields for QuickBooks Premier Desktop?
Hello Dee,
First of all I would note that we provide separate import tool for QuickBooks Desktop (it also called Business Importer, click here for more details). Import with custom fields in Business Importer Desktop is pretty simple. You should turn on the setting “Enable custom fields defined in QuickBooks” in our app’s Settings, then you will be able to see all your companie’s custom fields on Mapping step for selected import type (Invoice, Sales Order, Sales Receipt etc).
If you need any further assistance do not hesitate to contact us.
Best regards,
Andrew Shitsko
Email: help-desktop@cloudbusinessltd.com